
Utilities & Upload Tools
The utilities section contains tools for inputting/exporting large amounts of information.
Utilities include:
Add Session: This allows you to log a meeting’s attendance for a date. For meetings with individual attendance, simply choose the meeting, choose a date, and click the button for each member corresponding to present, excused, or unexcused. For non-individual attendance meetings, choose the meeting, enter a date, and enter the number present.
Mass Contact: From here you can send email, text messages (SMS), or Voice messages to everyone in one of multiple groups. Email will be personalized and addressed to each individual – not just a big list.
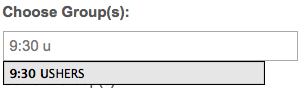
- Choose the group(s) you wish to contact.
- Choose to include active and/or inactive people.

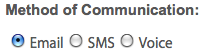
- Choose the communication method: either Email, SMS, or Voice. (Note: SMS/Voice only exist after having enable integration with Twilio on the Setting page.)
- For voice messages, choose the voice recording from the list. You can preview/listen to it by using the “Preview” link.
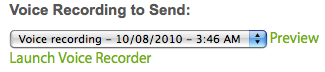
You can record a new message by using the voice record. Click the, “Launch Voice Recorder” link. Use the record button to record the message, the stop button to stp recording, and the play button to preview it. Click record again to record a new message. When you satisfied with your recording, click “Upload”. The list of voice messages will update to reflect your newly recorded message.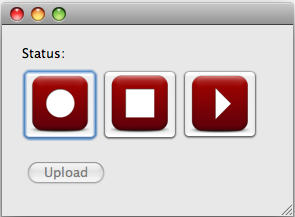
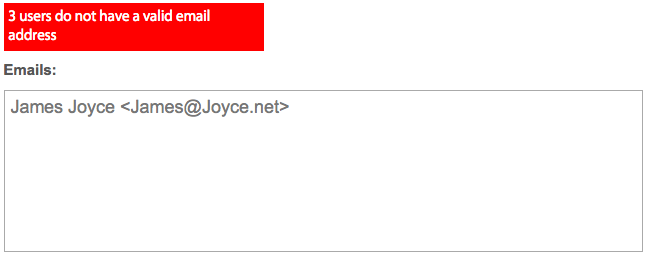
- You will be shown all of the emails or phone numbers (depending on the selected method) for the selected method, and how many people do not have valid contact details. You can also add emails in the format of: “Firstname Lastname
- Enter a subject.
- Choose the “From Phone Number”. This list contains the numbers authorized on the Settings > Services in the Twilio section.
- Enter the body of the message. For emails, you will have an editor that will let you format your message (add bold, headings, lists, etc.). For SMS messages there is a counter above the top right of the body box that shows how many character are remaining. The body of email/SMS messages can be personalized with the first name of the recipient by using the placeholder @NAME to represent their first name. For instance: “Hello @NAME, I was sorry to miss you this last Wednesday; I hope to see you next week.”
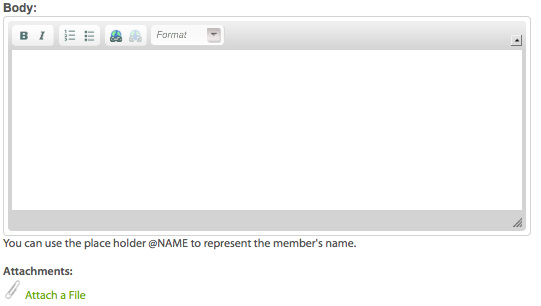
- For emails, you can also optionally upload files to be attached to the email.
Import Member Data: This allows for the importing of members into the system. You can also update member information this way. If you are importing a member and the first and last names match a member in the system, that person will be updated with the new information. The type of file needed for the import is a Comma Separated Value file (CSV). Many spreadsheet and contact manager applications will export/Save-As to this format. For instance, in Microsoft Excel, Go to “Save As”, and choose. “Comma Separated Value (.csv)”. You can import as much or as little information as you have on someone.
- Select the file by clicking, “Browse”.
- Enter the Column header names from your spreadsheet. If you do not have a column that is asked for, or, if you wish not to import that information, leave it blank.
- If you wish to place the soon-to-be-imported members into any groups, select those too. To select multiples, hold the CTRL key (Windows) or Command key (OSX) and click the group names.
- Click, “Submit”, at the bottom.
- You will now be shown a screen to confirm your import/update. If the member already exists, he/she will have a green check mark, and any changes to their information will be shown in bold. Example: “Address: 123 High Drive -> 456 Low Road”. This shows the old information on the left, and the new on the right.
- If you are satisfied with the proposed changes, click, “Yes”, at the top. If not, revise the data in your original spreadsheet/contact manager and re-import.
Export Data: From here you can export a CSV file of the membership information for all of the people in the system. This can easily be opened in Excel or other spreadsheet/database programs.
Input Giving: This allows for the batch inputting of giving information.
- Enter the expected total in the “Batch Total” box. This will be used to check your inputting of individual records below.
- In the member box, start typing a name, and then choose from the suggestions.
- Hit the “Tab” key. Select the giving, “Category”.
- Hit the “Tab” key. Enter an amount without a dollar sign.
- Once you run out of fields, you can hit the tab key to select “Add five more lines”. Then hit, “Enter”.
- Repeat until you are done; then, click, “Save”.
Import Giving: This makes it much easier to transfer in giving from PayPal and online giving services like EasyTithe and SimpleGive. This also means that new customers will most likely not have to to pay us to import their data, they can do it themselves!
- To get started importing giving, go to Utilities > Import Giving. Note: you must have the “input batch giving” permission to use this tool.
- Choose your comma separated value (CSV) file, and enter the column headers for each of the required columns. Click, “Next”.
- Review the proposed import:
- We attempt to match the first and last name given to names in the system. However, if we can’t you will need to use the search box to choose an existing person, or choose the “Anonymous” person. Once you fix one name, if there are other entries with that same name, you’ll be given the option to automatically update all of them.
- We also try to match the giving category in the import with the ones you already have in the system. However, if there isn’t a match, you will need to manually choose, and, once again, you’ll be given the option to update all.
- If the date isn’t in a format we can understand, you’ll be asked to enter one.
- Once you’ve satisfied with the proposed import, click “Save”.
- You’re done!
The import will correctly group entries for people who have chosen to have their giving grouped under their primary family member.